Mini
class: Using interval filters with ULE
As at: 8 March 2014
What
The purpose of this document is to illustrate how to create and use interval filters with ULE.
Why
This feature allows a user to mark events that occur in intervals defined by the user.
This can be useful to carry out research on why a cycle works during some intervals but not in others. �It is typically the case that no apparent regularity is associated with such behaviour, and it is therefore useful for the user to be able to create their own set of intervals based on whatever criteria they may wish to use. �These intervals can then be used in ULE (ie combined with any of the many other events that ULE covers such as aspects, ingresses etc).
The intervals may be arbitrary or based on certain criteria such as intervals where a US president is a democrat.
In some situations, key dates can be extracted using Timing Solution (eg dates of say Jupiter/Saturn conjunctions) and such dates may then be used as a basis to form desired intervals for filtering (eg the user may choose to utilise every second such event instead of every instance).
How: Step by step
1. Ensure that data has been uploaded for the desired market to be analysed. �Also ensure that the TS version you are using is dated after 6 March 2014.
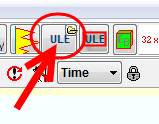
2. Click on ULE
3. Click on Fundamentals

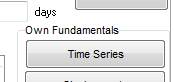
4. Click on Own Fundamentals - Time Series
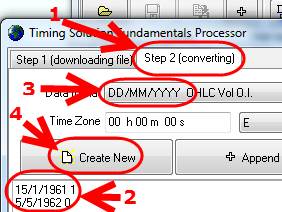
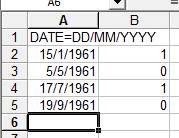
5. Go to the "Step 2" tab and insert the dates for the desired interval (note that the interval start date is followed by a space and a "1" flag and the interval end date is followed by a space and a "0" flag). �Ensure that the date format matches the dates input (in the case below, the European format has been used) and then click on "Create new". �Note that multiple intervals may be specified but remember to ensure that the start date for each interval is followed by a "1" flag and the end date by a "0" flag in the same way shown for the first interval.
Note that that the relevant dates (together with the "1" and "0" flags) can be pasted from an Excel spreadsheet file or a text document if desired (this is handy if you have many such dates already captured elsewhere). �Also note that if you have already created a spreadsheet file with the dates and flags, you may import that file without having to create a new one (see step 11 below).
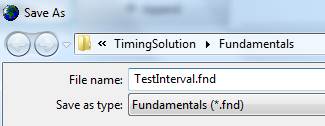
6. Save the new file in the Timing Solution/Fundamentals folder (it will automatically be given a ".fnd" file extension)
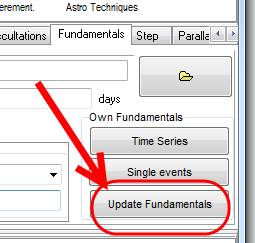
7. Return to the ULE/Fundamentals tab and click on Update Fundamentals
8. The new file can then be opened by clicking on the folder icon (see item 1 in the screenshot below) and the file name will then appear in the file name box (see item 2 in the screenshot below). �Click on the "+" icon (see item 3 in the screenshot below to see ULE item L1 appear (see item 4 in the screenshot below). �By clicking on the "Calculate" icon, you will see the desired interval marked on the price chart.

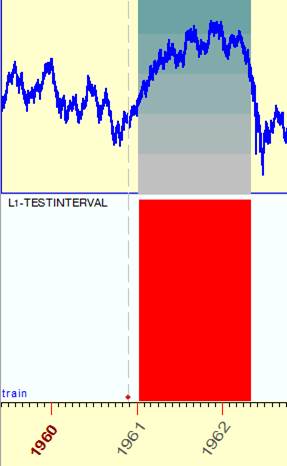
9. See the following screen shot for an example of how the desired interval can be displayed. �All the normal choices for ULE items are available.
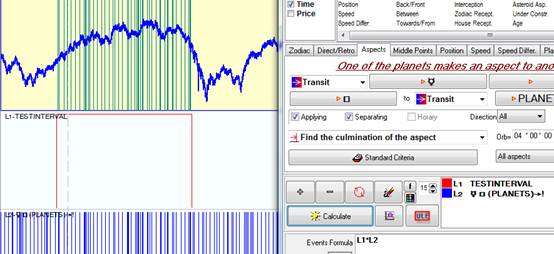
10. The following screen shot shows the chosen interval combined with another ULE item (chosen at random).
11. As mentioned in step 5 above, if you have already created a spreadsheet CSV file with the dates and flags, you may import that file without having to create a new one. Here is a screenshot of an Excel file with two intervals defined, including the flags (ie "1" to indicate the interval start date and "0" to indicate the interval end date).
Note that in this case the Date format has been set to the European format. �There is no need to set the date format if the user uses the default which is MM/DD/YYYY. �This content would be saved as a CSV file rather than the default format used by Excel.
12. Once the csv file has been created and saved, click on the Update Fundamentals button as per step 7 above before following the remaining steps as noted in step 8 above.� If Excel was used to create the csv file, ensure that the file is no longer open in Excel since the operating system may prevent that file being accessed by another program (such as TS) at the same time.
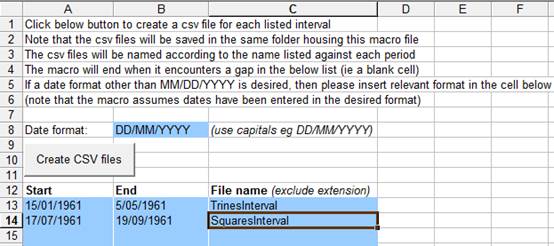
13. Note that if it is desired to apply different ULE criteria to each time interval, it will be necessary to create a separate file for each interval since ULE is not able to differentiate between multiple intervals in one file.� For example, say you wanted to look at trine aspects in combination with one interval, but square aspects in combination with a second interval.� In such a case, two separate files would need to be created so that a ULE formula could be created (eg L1(trines)*L2(interval 1) + L3(squares)*L4(interval 2).� If there are many such intervals, then a macro can be used to create separate csv files from a single spreadsheet that has all the relevant periods listed.� For example, the following screen shot shows such a macro which was provided with this mini class.� The macro uses the periods indicated to create separate csv files with the names noted in the list (see screenshot).
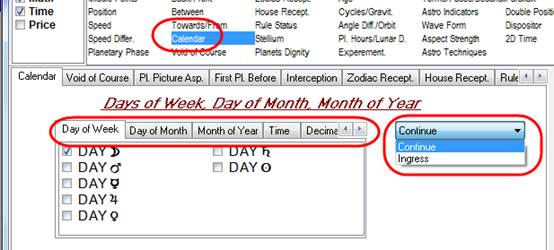
14. It may also be worth noting the ULE/Calendar module which allows users to set day of week, day of month, month of year, time, decimal pattern (eg years ending in 8), special years etc (but not customised intervals in the manner outlined above). In each case, the user may set the moment (ie ingress) or the period.