Charting tools in Timing Solution
Items Covered in This Section
Though Timing Solution is focused on getting a reliable projection line (forecast), it has many other tools used by traders for decision making. They are present in the software to give you a choice and a way to compare different techniques.
We have already discussed in brief some of Technical Analysis indicators and charting tools (see the article on basics of Timing Solution software here ). Now let us speak in more details about this popular item, charting tools.
Charting tools explore the idea of geometric patterns of the chart. The simplest example is a trend line: you believe that it goes further for some time, so you assume that the next price bar/bars will be located on it (or very close to it). So, in brief, you need just to know the key points of that line. They are called anchors. For a trend line, you need just 2 anchors. Other charting tools may have more anchors. Charting tools provide a lot of visual information, they are addictive. You may spent hours exploring their variety. Just remember that these tools are very subjective: you think that there is some geometric pattern; you believe it starts at some point; you assume that it continues working for some time ahead. Another person may receive different results, using the same tool for the same data (just moving one of the anchors slightly!). So many assumptions, and there is no way to verify that technique.
Timing Solution has a great variety of them. You will find there the simplest ones and the most popular ones - such as trend lines, Andrews pitchforks, Fibonacci levels, Gann fans, etc. We went even further - Timing Solution offers new charting tools, or "smart" charting tools. These charting tools are quite simple in use while having complicated math behind. Due to the large amount of Charting Tools available, this lesson will only discuss the more widely used ones. A full explanation of all the Charting Tools available in Timing Solution can be found here.
Using Charting Tools in Timing Solution
Top three buttons
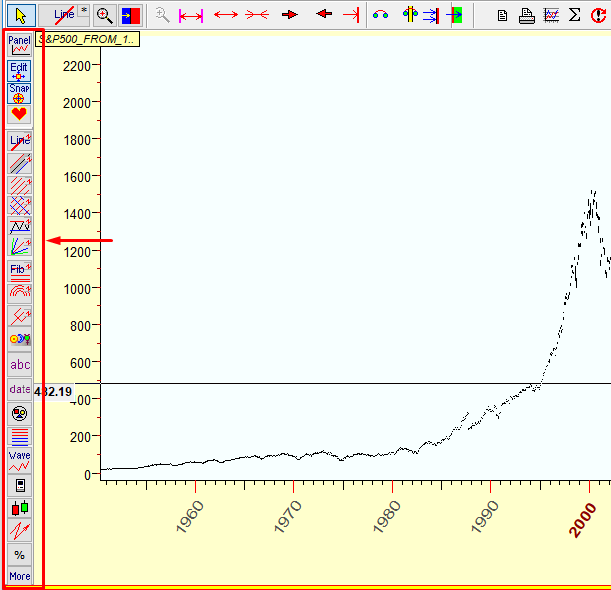
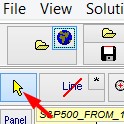
All buttons related to the charting tools are located on the left side of the Main window. First three buttons work with already created charting tool. Then a set of buttons follows, each one is dedicated to a specific charting tool.
The button at the top, opens the Charting Panel window:
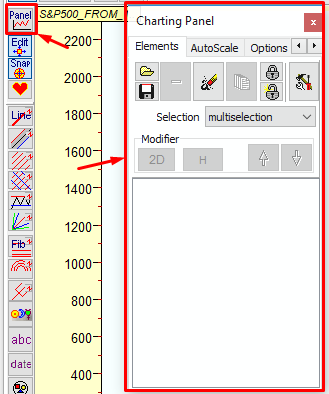
Here you can save or download previously saved charting elements (charting tools), delete them, make a copy of any charting element, lock/unlock them.
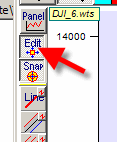
The second button, "Edit", is used to modify the anchor position of the charting tool (it is activated by default):
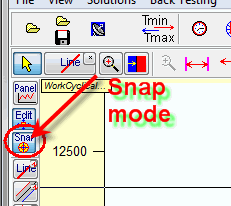
The third button, "Snap", is very useful when it is not easy to define a proper price point for the anchor. The program itself sets the anchors on the nearest highest high or lowest low ('nearest" to the position of the mouse cursor on the screen). It is also activated by default:
These three buttons are very useful.
How to draw a Charting Tool
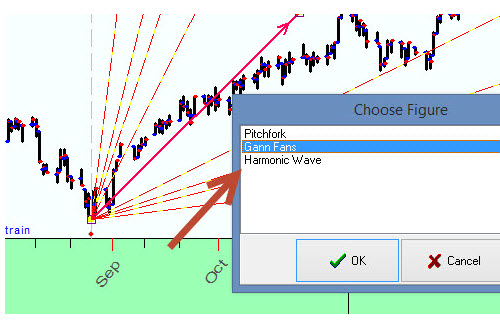
Now, let us look at the charting tools that are available in Timing Solution software. Here they are:
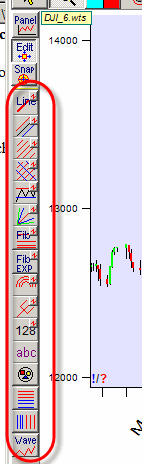
When you click on any tool, the window appears with instructions on what you should do to draw the chosen Charting Tool.
If you click on a charting tool by error and are not going to draw it, click on this button on top to delete the instruction from the screen:
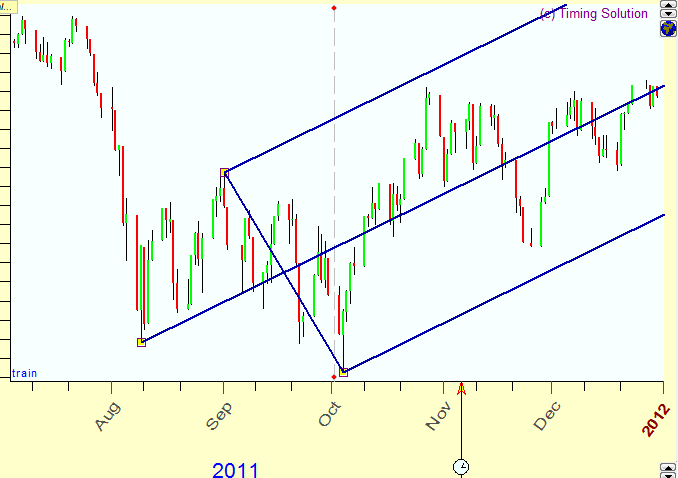
Let us draw together Andrews pitchfork. Follow these steps (they are pretty much the same for all charting tools):
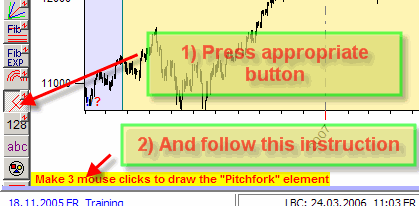
For this particular tool, you have to do three mouse clicks. Doing that, you define its anchor points (the anchor points are marked by yellow squares):

For any other charting tool, the appropriate instruction defines its anchor points.
If you have some difficulties in defining a proper anchor point (like being confused on where is the lowest low in the areas with high density of price oscillations), the program is set by default in "Snap" mode; it automatically sets the anchors to the nearest highest high or lowest low while you move the cursor across the screen.
If you do not want "Snap" mode to be employed (if you prefer to set the anchor at a certain date and a certain time moment), do not forget de-activate "Snap" button by clicking on it.
Modifying a Charting Tool
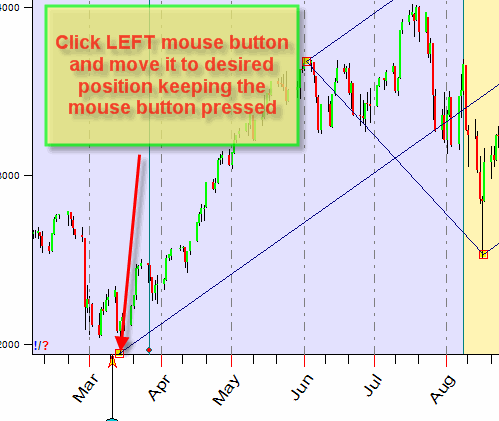
After the charting tool is applied, you may decide that it does not help you much in your situation. Maybe, the anchors were not set at the best position. If it is the case, you can easily modify the initial position of any anchor. Remember that "Edit" button is activated by default. You need to just press LEFT mouse button at the anchor that you would like to be re-positioned and drag the mouse cursor to a new location of that anchor (while holding the left mouse button):
This is important: "Edit" button is activated if you can see the anchors on the screen. If you like the view of your charting tool and do not plan to modify it, make sure that you de-activated the Edit button (click on it):
Charting Tools options
Changing the anchor's position is only one of the possible modifications. Practically all charting tools in Timing Solution have many variations. As an example, have a look at the classical Andrews pitchfork:
Here is the variation of that same pitchfork:
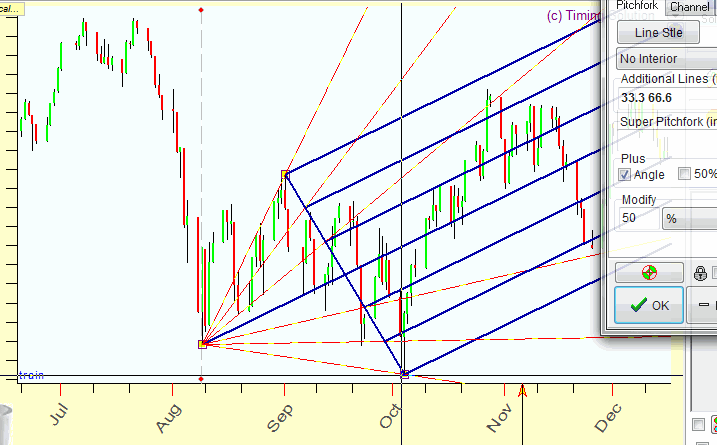
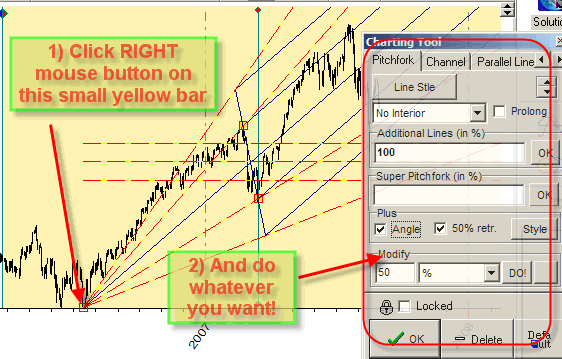
To modify any charting tool, RIGHT click on the anchor (small yellow box). You will then get the dialog box to customize your charting tool:
The Andrews pitchfork requires three anchor points. Some charting elements require two anchor points only. For example, to draw the Fibonacci grids, simply drag the mouse from one anchor point to another:

As with the pitchfork, right click on any yellow anchor bar to modify your Fibonacci grid (its colors, price/time grids, marks):
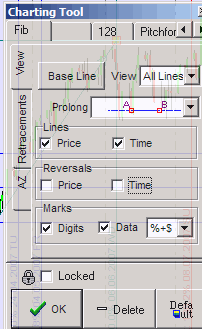
In "Retracements" tab you can add a new line and set the color and the width for any of these lines:

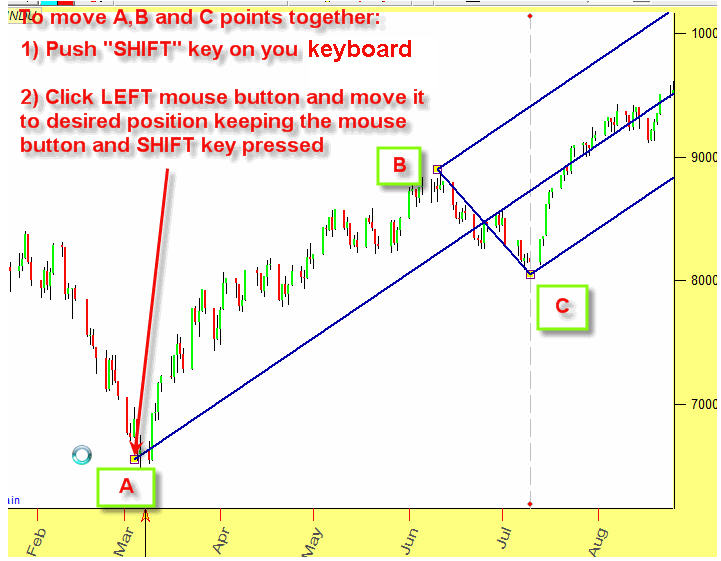
How to move a Charting Tool
Sometimes it is necessary to move the whole figure, i.e. moving all anchors of a tool. In order to do that, do the same procedure as for moving a single anchor point, while keeping the Shift button pressed. Thus you can move the whole figure:
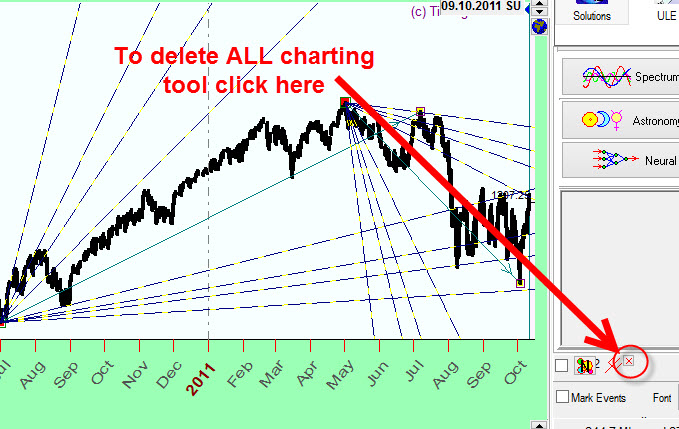
Deleting Charting tools
To delete ALL charting tools, click the "x" button in the right bottom corner:
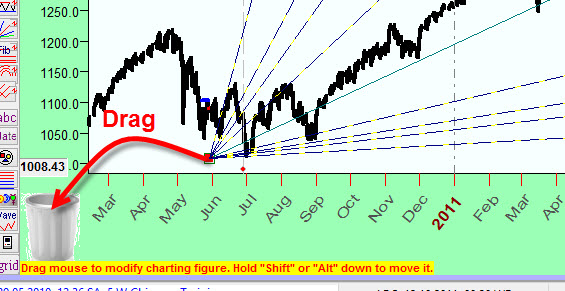
You can also delete any charting tool by dragging it into the garbage bin in the left bottom corner of the price chart:
Charting Panel
All the chart tool manipulations listed above can be done through "Charting panel" window:

Clicking "-' button, you can delete a highlighted charting tool:
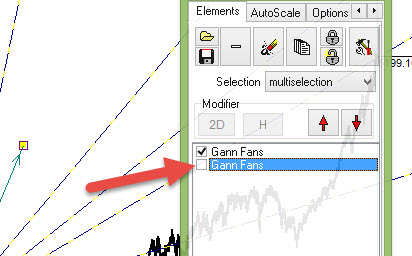
You can hide an item by unchecking it in the list:
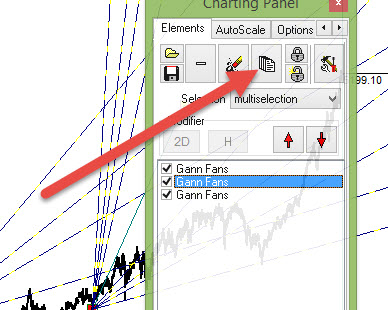
You can make a copy of a highlighted charting tool by clicking the copy button:
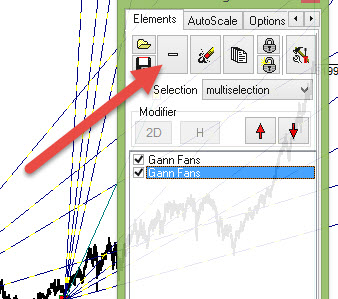
Multi-Selection
Often several charting tools have very closely located anchors, like in the chart below. You can see that there are three charting tools that have anchors located practically at the same place:
In this case when you modify the anchors position by dragging the mouse cursor, the program will pick up ALL closely located anchors. So, while dragging one anchor, you actually move three anchors in this example).
You can select a specific tool in the Charting Panel from the Selection drop down menu. Selecting "Last created" will select the last tool that has been created.
If you want to select any other of the Charting tools, select the "from List" option. After that click on the anchor you want to move and a list of all the Charting Tools at that location will be shown in a new window. Select the tool you want and then you will be able to move its anchor right away.
Copying a Charting Tool
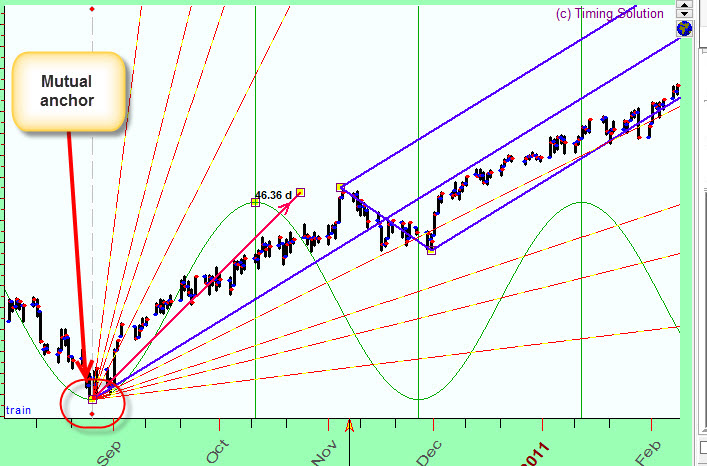
Sometimes it is necessary to make a copy of a Charting Tool and place it at another position of price chart, like in the example below:
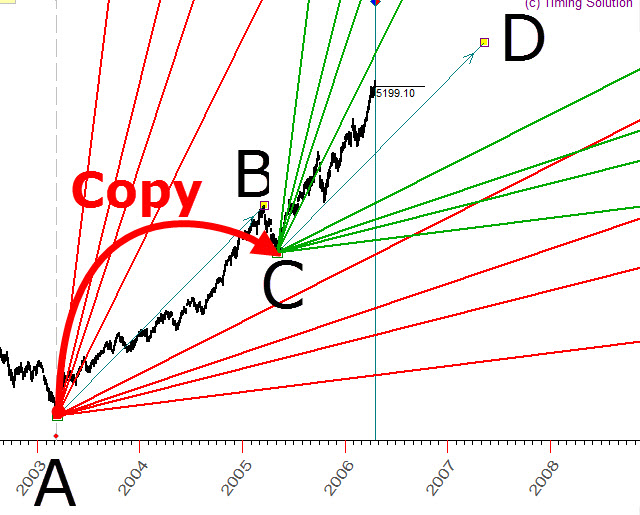
In the example above we have created the charting tool Gann fan A-B, made its copy and moved it to another initial point C.
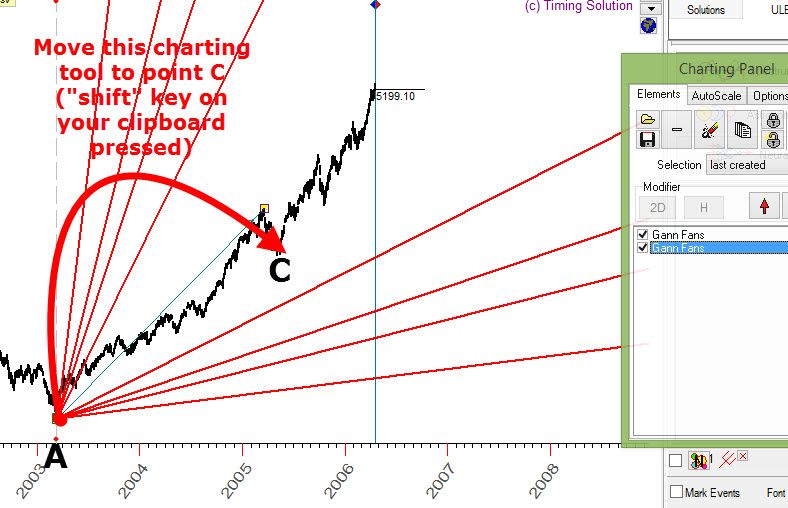
To do that, open Charting panel and make a copy of this charting tool as explained above:
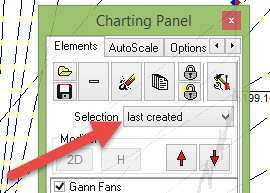
Choose "last created" in the selection drop-down menu:
Now move this charting tool to point C:
Additional Features
 Opens a window with
your favorites. If you use some charting tools more often than others,
you may want to save them with all parameters that you have already applied.
Opens a window with
your favorites. If you use some charting tools more often than others,
you may want to save them with all parameters that you have already applied.
In addition look at these three buttons:
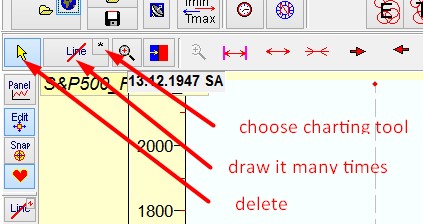
The "*" button on the right allows you to choose some of the more commonly used Charting Tools quickly. The bigger button by the "*" allows you to create the charting tool multiple times. Clicking on it will keep it active, and as long as it is active you can create as many multiple tools as you want. In the example above, Line tool was selected and it allows you to create as many lines as you need. The cursor button to the left allows you to move and delete any tool you select.
 This button opens a menu for different types of counters:
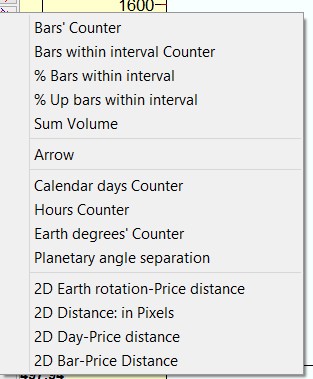
It is a very useful feature that gives you a selection of different counters.
 Is another feature. Clicking it opens this menu: Need to expand what it is. For usual traders this is obvious but for a new person it can be confusing. There are a lot of features here (like monthly chart selecting a month and coloring based on whether it was a net gain or loss that month. But then there are 15 min charts which I am confused about) Should I go into detail about each one? Either way we need to expand on this one.

Smart Charting Tools
So far, we have discussed classical charting tools. Timing Solution also provides a variety of Smart Charting Tools that employ complicated math.
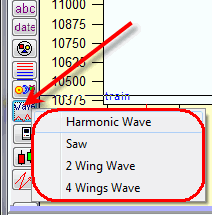
We recommend to start with the simplest ones by clicking "Wave" button:
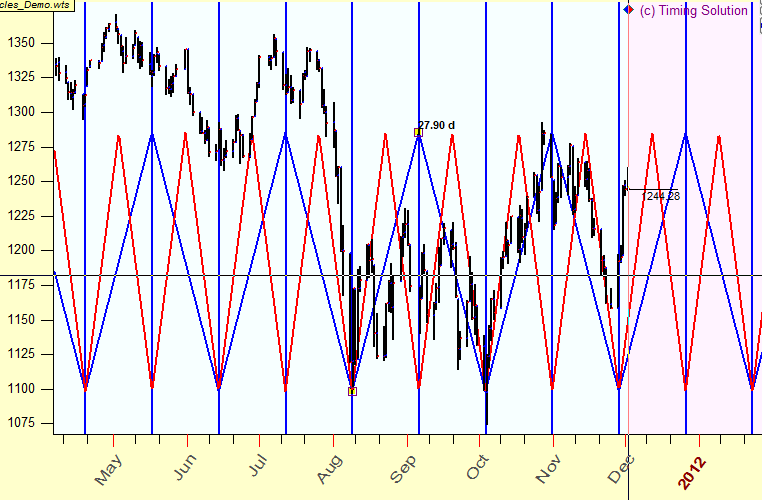
The charting tools in this category allow to conduct visual cyclical analysis, i.e. draw regular waves overlaying the price chart. This is "Saw" wave with one overtone:
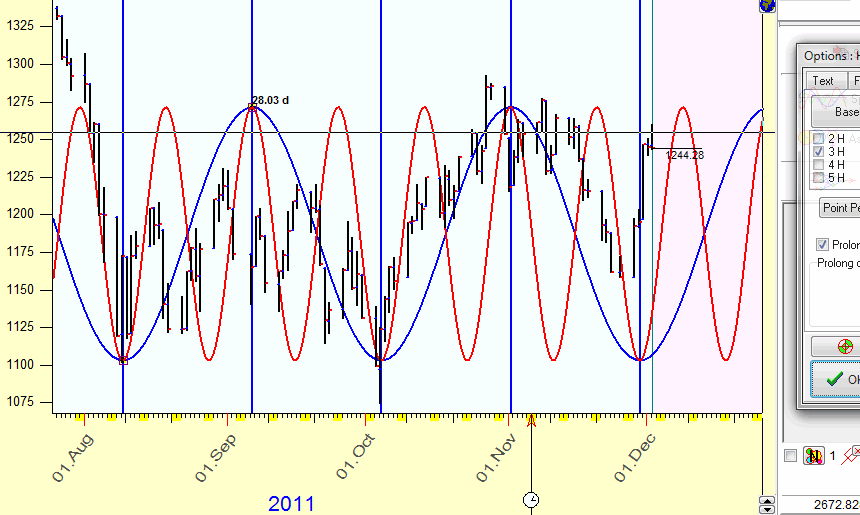
This is an example of a harmonic wave:
There are more options under that menu:
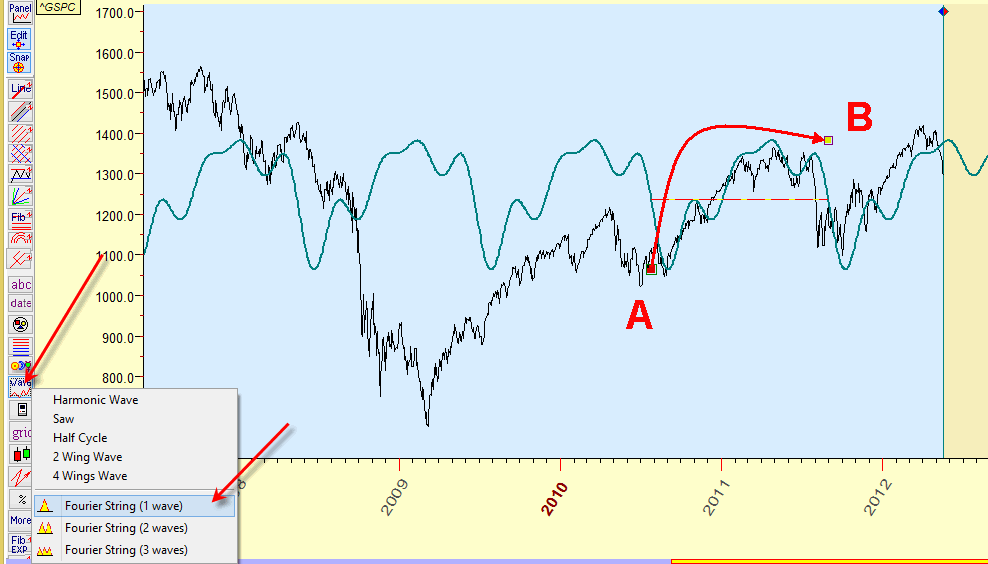
There you will find more advanced cyclical charting tools. One of them is Fourier String charting tool. It conducts Fourier analysis fantastically fast while you move the cursor over the screen:
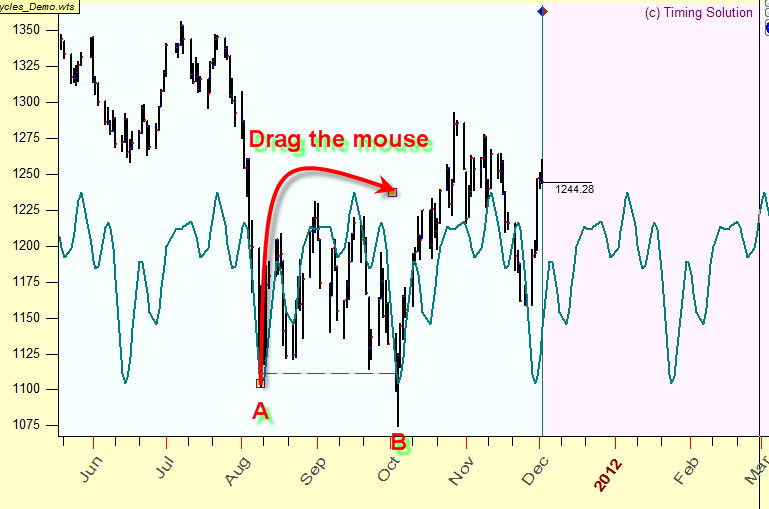
All these charting tools are prolonged into the future, i.e. they can be used as forecasting tools.
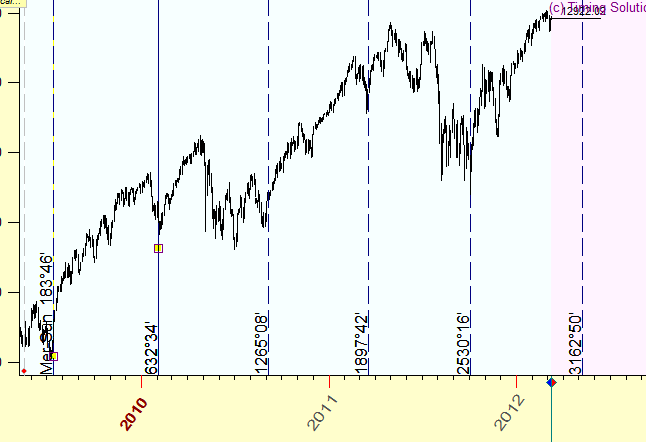
Astro based Charting Tools
We recommend to try a special category of charting tools - astro based charting tools. These charting tools are very popular among Timing Solution users. As an example, look at the chart below. It shows planetary equidistant lines based on Mercury phases:
All the smart chart and astro based techniques are described in details: here
This concludes the Charting Tools lesson. Next we will be talking about a unique Timing Solution feature called Universal Language of Events.